Just a quick note to anyone living in West Wales. I have a stall at the Craft and garden festival in Aberaeron tomorrow (26/ 5 /13) and Monday.It will be held in the grass square where the cob festival is held. I will be in the marquee and would love to meet you so pop in and have a chat if you're there.

A PLACE TO EXPLORE FELT MAKING AND OTHER CRAFT TECHNIQUES
Saturday, 25 May 2013


Friday, 24 May 2013
felt painting - 3. Adding Stitching
Today we will take a closer look at adding stitching to your felt. Stitching can be done by hand , machine or both. It enables you to add fine details to your work and to add extra movement and texture. You will need threads to go with your design. If you are using a sewing machine you will need to be able to free machine. I use a quilting foot but you can lower the feed dogs on some machines. When sewing by hand I find a chenille needle the most useful as it has a large eye for threading thick threads and yarn but a sharp point. You will also need some sharp scissors.
 The first part of the picture I usually stitch is the horizon and outlines of hills. Use cotton to match the colours you are stitching on. You generally don't want the stitching to jump out at you. I then stitch contours of the land which helps the viewers eye to make sense of distance and direction. Here is my felt with just those parts stitched.
 Next I outline areas that I want to stand out such as the house and the large flowers in the foreground. I also added lowlights and highlights to the tree trunk and stitched in between the rows of flowers. The stones in the wall were outlined to help with a feeling of texture and windows were added to the farmhouse. I've lined up the reels of cotton used in the machine stitching so you can get an idea of how many I use in my felts.
 I could have stopped here but decided the work would be further enhanced by adding a little hand stitching. I've added french knots to the centres of some of the flowers and small stab stitches to some further back in the picture. I have also added a few tufts of grass against the wall. Even the most avid gardener has a few uninvited plants. Here is the completed felt mounted on a canvas.
 People tend to think as the stitching as a sort of after thought but I hope this has shown what an important part of the process this is. In fact it can sometimes take as long to add the stitching as it does to lay down the fibres.
 The first part of the picture I usually stitch is the horizon and outlines of hills. Use cotton to match the colours you are stitching on. You generally don't want the stitching to jump out at you. I then stitch contours of the land which helps the viewers eye to make sense of distance and direction. Here is my felt with just those parts stitched.
 Next I outline areas that I want to stand out such as the house and the large flowers in the foreground. I also added lowlights and highlights to the tree trunk and stitched in between the rows of flowers. The stones in the wall were outlined to help with a feeling of texture and windows were added to the farmhouse. I've lined up the reels of cotton used in the machine stitching so you can get an idea of how many I use in my felts.
 I could have stopped here but decided the work would be further enhanced by adding a little hand stitching. I've added french knots to the centres of some of the flowers and small stab stitches to some further back in the picture. I have also added a few tufts of grass against the wall. Even the most avid gardener has a few uninvited plants. Here is the completed felt mounted on a canvas.
 People tend to think as the stitching as a sort of after thought but I hope this has shown what an important part of the process this is. In fact it can sometimes take as long to add the stitching as it does to lay down the fibres.
This picture was completed and listed in my etsy shop yesterday but has been sold already. However if you would like to see more photos of it. Some are closer up views. You can visit my shop by clicking on the etsy mini at the top of the page and look at my sold orders. You will still be able to access the photographs.
Thursday, 23 May 2013
felt paintings - 2
Hi
Yesterday we covered the first stage of creating a felt ' painting'. Today we will go through the wet felting stage for those of you who are not familiar with it.
 The first thing you need to do is place your needle felted picture on to a bamboo blind. If you are working on a small scale a sushi mat will be fine. Next you need to take your courage in both hands and dribble warm, soapy water all over your needle felt. Don't worry. The fact that the barbed needle has been used is enough to secure your fibres and keep them where you want them to be as long as you only dribble or spray the water.
 Next, cover the wet needle felt with bubble wrap. Some people use netting at this stage but I find that the woollen fibres will often felt in to the net causing distortions when you try to remove it. Now starting in the centre press hard on the bubble wrap and moving to the edges press out any air bubbles. This will ensure good contact between the woollen fibres and pre felt so they can bond together. When you are satisfied that there are no more pockets of air spray a little soapy water on top of the bubble wrap to make it slippery. With your hand pressed flat, rub in a circular motion. Start gently and gradually increase pressure. Check your felt from time to time by lifting a corner of the bubble wrap and gently pushing your design with your finger tip. If it moves around rub more. If it is stable you can go on to the next stage. The rubbing can take anything from 15 minutes to an hour or more depending on the size of your felt and how hard you are working.
 Once your design is stable you can roll up your bamboo blind with the felt and bubble wrap inside it. Have an old towel to hand as this squeezes some of the water out and you could end up with wet feet! Now roll the package backwards and forwards on the table. Count as you roll and roll for about 20 times. Unroll the blind and check your felt. There may be wrinkles in it. If there are gently smooth them out. Now you need to turn the felt so that one side is towards you. Be very careful when you pick it up as it is still quite fragile and will easily stretch out of shape. Roll up and roll as before. Turn again so the felt is upside down and repeat the rolling. Do the same with the last side. You have now rolled in all four directions and your felt should begin to feel firmer. It is usually a good idea to give it another rub and repeat the rollings again. After that place a plastic bag on your hand, remove the bubble wrap and rub again. Now repeat the rolling without the bubble wrap. By now the felt should feel more compact and thicker it should have also shrunk a little.
 If you have completed the previous stages correctly the felt should be quite stable and there is no danger of it falling apart. Fill a bowl or sink with cold water and rinse the bubbles from it. You will probably need to change the water 2 or 3 times until the water runs clear.
 Gently squeeze the excess water from the felt. The next stage surprises a lot of people but it hardens the felt and makes a really strong fabric. You need to scrunch the felt up and throw it repeatedly and quite forcefully on to the table. From time to time straighten the fabric out and fold it differently before throwing again. After a time the felt will develop little bumps all over it. When this happens your task is complete. It may have pulled out of shape but you can pull it back in to the correct shape by gently tugging on the appropriate edges.
 Here is my felt after wet felting. If you compare it with the photograph of the needle felted piece in yesterday's post you will see the difference between the two.
Yesterday we covered the first stage of creating a felt ' painting'. Today we will go through the wet felting stage for those of you who are not familiar with it.
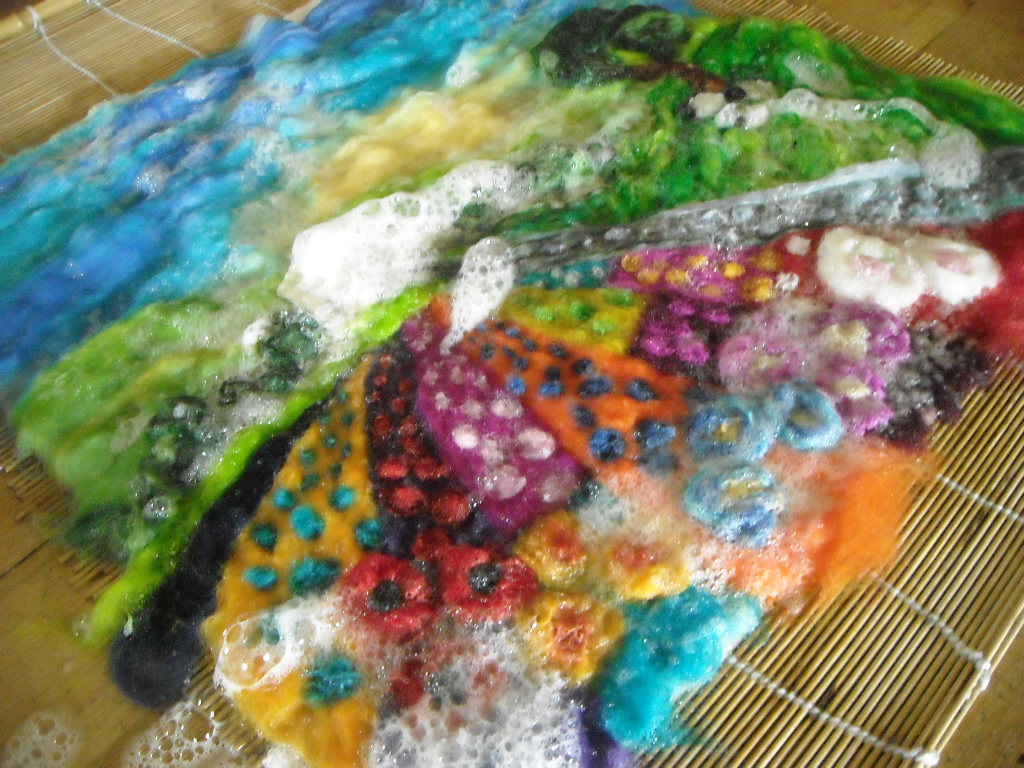 The first thing you need to do is place your needle felted picture on to a bamboo blind. If you are working on a small scale a sushi mat will be fine. Next you need to take your courage in both hands and dribble warm, soapy water all over your needle felt. Don't worry. The fact that the barbed needle has been used is enough to secure your fibres and keep them where you want them to be as long as you only dribble or spray the water.
 Next, cover the wet needle felt with bubble wrap. Some people use netting at this stage but I find that the woollen fibres will often felt in to the net causing distortions when you try to remove it. Now starting in the centre press hard on the bubble wrap and moving to the edges press out any air bubbles. This will ensure good contact between the woollen fibres and pre felt so they can bond together. When you are satisfied that there are no more pockets of air spray a little soapy water on top of the bubble wrap to make it slippery. With your hand pressed flat, rub in a circular motion. Start gently and gradually increase pressure. Check your felt from time to time by lifting a corner of the bubble wrap and gently pushing your design with your finger tip. If it moves around rub more. If it is stable you can go on to the next stage. The rubbing can take anything from 15 minutes to an hour or more depending on the size of your felt and how hard you are working.
 Once your design is stable you can roll up your bamboo blind with the felt and bubble wrap inside it. Have an old towel to hand as this squeezes some of the water out and you could end up with wet feet! Now roll the package backwards and forwards on the table. Count as you roll and roll for about 20 times. Unroll the blind and check your felt. There may be wrinkles in it. If there are gently smooth them out. Now you need to turn the felt so that one side is towards you. Be very careful when you pick it up as it is still quite fragile and will easily stretch out of shape. Roll up and roll as before. Turn again so the felt is upside down and repeat the rolling. Do the same with the last side. You have now rolled in all four directions and your felt should begin to feel firmer. It is usually a good idea to give it another rub and repeat the rollings again. After that place a plastic bag on your hand, remove the bubble wrap and rub again. Now repeat the rolling without the bubble wrap. By now the felt should feel more compact and thicker it should have also shrunk a little.
 If you have completed the previous stages correctly the felt should be quite stable and there is no danger of it falling apart. Fill a bowl or sink with cold water and rinse the bubbles from it. You will probably need to change the water 2 or 3 times until the water runs clear.
 Gently squeeze the excess water from the felt. The next stage surprises a lot of people but it hardens the felt and makes a really strong fabric. You need to scrunch the felt up and throw it repeatedly and quite forcefully on to the table. From time to time straighten the fabric out and fold it differently before throwing again. After a time the felt will develop little bumps all over it. When this happens your task is complete. It may have pulled out of shape but you can pull it back in to the correct shape by gently tugging on the appropriate edges.
 Here is my felt after wet felting. If you compare it with the photograph of the needle felted piece in yesterday's post you will see the difference between the two.
Place your soggy felt somewhere warm to dry ( it can be put in a washing machine, on a spin cycle first). When dry it will be ready for stitching which I will cover tomorrow.
Wednesday, 22 May 2013
Painting with fibres, how to make a felt picture. 1.
I often get asked 'how do you make them?'. It is not really a difficult process but easier to show than explain. Today I will show you how to lay out and needle felt your fibres. The next post will be how to wet felt your art and then we will cover the stitching.
The first thing you need is subject matter. When felting it is much better to work big and bold than to try to be subtle. Subtle is possible but when you get to the wet felting stage things blend and merge together and you can end up with something that just looks 'muddy'. Perhaps that is why so many people just needle felt?
To start with you need to select your colours and have a base to work on. It is best to use a white pre felt. You can either make this yourself or buy ready made pre felt. It must be 100% wool and it is sometimes called needle punch. Cut your pre felt slightly larger than you want the finished picture to be and lay it on a piece of foam.
 Begin to lay out you wool fibres on to the pre felt. If you are creating a landscape start at the top with the sky. This will give you a nice tidy horizon. The sky can set the mood for the whole picture so be sure to use your colours carefully. For a sunny day yellow, white and clear blues. For storms purple and grey can be mixed with darker blue. You can mix the colours as you can paint. The easiest way is to use carders but it is possible to mix with your fingers. Make sure all of the fibres overlap each other so you do not end up with holes and the white background showing through. When you are happy with an area begin to needle felt with a special , barbed needle.
 This will begin to tangle the fibres together and hold everything in place. Continue to work down the felt building up your picture as you go. Bear in mind that things which are far away look smaller and less distinct than those close to the foreground. A flower at the front of your picture may be bigger than a house at the back!
 Here is my picture after needle felting. Note that I have not added any fine detail. Unless you are working on a very large scale felt is too unwieldy for fine detail. That can be added later with stitching. See how I have mixed different greens together and laid them in different directions to suggest the contours of the land? All of these things help to make the finished picture more interesting and lively.
The first thing you need is subject matter. When felting it is much better to work big and bold than to try to be subtle. Subtle is possible but when you get to the wet felting stage things blend and merge together and you can end up with something that just looks 'muddy'. Perhaps that is why so many people just needle felt?
To start with you need to select your colours and have a base to work on. It is best to use a white pre felt. You can either make this yourself or buy ready made pre felt. It must be 100% wool and it is sometimes called needle punch. Cut your pre felt slightly larger than you want the finished picture to be and lay it on a piece of foam.
 Begin to lay out you wool fibres on to the pre felt. If you are creating a landscape start at the top with the sky. This will give you a nice tidy horizon. The sky can set the mood for the whole picture so be sure to use your colours carefully. For a sunny day yellow, white and clear blues. For storms purple and grey can be mixed with darker blue. You can mix the colours as you can paint. The easiest way is to use carders but it is possible to mix with your fingers. Make sure all of the fibres overlap each other so you do not end up with holes and the white background showing through. When you are happy with an area begin to needle felt with a special , barbed needle.
 This will begin to tangle the fibres together and hold everything in place. Continue to work down the felt building up your picture as you go. Bear in mind that things which are far away look smaller and less distinct than those close to the foreground. A flower at the front of your picture may be bigger than a house at the back!
 Here is my picture after needle felting. Note that I have not added any fine detail. Unless you are working on a very large scale felt is too unwieldy for fine detail. That can be added later with stitching. See how I have mixed different greens together and laid them in different directions to suggest the contours of the land? All of these things help to make the finished picture more interesting and lively.
Tomorrow I will show you how to wet felt your art work. Have fun!
Monday, 15 April 2013
And another one!
Here is another of those team treasuries. Lovely shades of blue in this one.
https://www.etsy.com/treasury/MjAyNjcxMzN8MjcyNDI3NTI3MA/gorgeous-gifts?index=0
https://www.etsy.com/treasury/MjAyNjcxMzN8MjcyNDI3NTI3MA/gorgeous-gifts?index=0
Etsy team launch day
A new team on etsy is holding it's launch day today (15th April). Some shops are offering 10% discount for today only. There are lots of treasuries being made to showcase the beautiful work on offer. All of the team members can join by invitation only to ensure that only the finest work from the EU is included.
The team is called etsy pickedbyhandeu.
This is the treasury I have created today with 16 of my team mates in it. I will try and post more of the treasuries created later.
https://www.etsy.com/treasury/MjAwOTEwNzB8MjcyMTcyOTgxOQ/april-finds
The team is called etsy pickedbyhandeu.
This is the treasury I have created today with 16 of my team mates in it. I will try and post more of the treasuries created later.
https://www.etsy.com/treasury/MjAwOTEwNzB8MjcyMTcyOTgxOQ/april-finds
Monday, 8 April 2013
Felting with children
Felt making can be a wonderful learning through play experience for children of all ages. Art, science, history and geography can all be incorporated. I admit I have never done a children's workshop but I have made felt with my grandchildren. I think one of them was only 2 years old the first time we did it. Here is how to do it.
Materials
The most basic of materials can be used. Bubble wrap, soap, water and fleece are all that is needed. If you have silk fibres, yarn off cuts and glitter it can be even more fun.
Method
Lay the bubble wrap on the table and lay out two layers of woollen fibres with the fibres going in the opposite directions. I have used black and white in the photo so the layers are clear to you.
Then let the children have a field day with colour. They need to cover the base layers with colour. As long as the layers are not too thick they can splodge colours on anyway they like. Older children might like to make a simple picture.

 Next the picture can be built up further with the addition of yarns, silk or glitter.

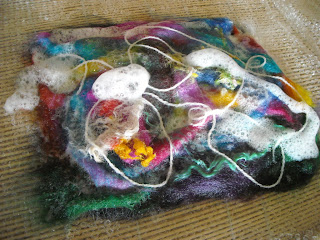

 Once the fibres are all firmly tangled together roll the wool and bubble wrap up like a swiss roll. If you have a bamboo mat to roll it up in it will be easier but if not just put a towel on the table underneath the roll. Now roll it backwards and forwards across the table. Unwrap, turn it around and do it again. Do this with all four sides in turn. It should begin to feel firm now and more stable.


Materials
The most basic of materials can be used. Bubble wrap, soap, water and fleece are all that is needed. If you have silk fibres, yarn off cuts and glitter it can be even more fun.
Method
Lay the bubble wrap on the table and lay out two layers of woollen fibres with the fibres going in the opposite directions. I have used black and white in the photo so the layers are clear to you.
Then let the children have a field day with colour. They need to cover the base layers with colour. As long as the layers are not too thick they can splodge colours on anyway they like. Older children might like to make a simple picture.

 Next the picture can be built up further with the addition of yarns, silk or glitter.


Dribble soapy , warm water over the pile of fibres and fold the bubble wrap over so the fibres are in between two layers. Sprinkle a little soapy water on top of the bubble wrap to make it slippery and rub, in a circular motion all over. Keep rubbing with quite a bit of pressure to entangle all of the fibres together. When you think it is done carefully remove the top layer of bubble wrap and test gently with your finger to see if things still move around or are stuck together. If they have not adhered together continue to rub.
 Once the fibres are all firmly tangled together roll the wool and bubble wrap up like a swiss roll. If you have a bamboo mat to roll it up in it will be easier but if not just put a towel on the table underneath the roll. Now roll it backwards and forwards across the table. Unwrap, turn it around and do it again. Do this with all four sides in turn. It should begin to feel firm now and more stable.

Next you need to rinse out the bubbles and squeeze out the excess water. Use cold water for this bit as it helps to harden the felt. To finish screw the felt up in to a ball and repeatedly throw on to the table ( the boys like this bit best). When the felt begins to wrinkle up slightly it is done!
Just flatten it out and leave to dry.
At this stage I was going to show you a photograph of my finished piece but I am afraid the puppy got hold of it when it was drying, dragged it around the garden a few times and chewed it up. He is the innocent looking brown one but his friend was happy to play tug of war with it too.

Subscribe to:
Posts (Atom)