etsy mini

Tuesday, 10 August 2021

Fiddle mitts for dementia patients

Have you noticed that most activities to help charities involve running marathons, climbing mountains or jumping out of airplanes?  Well I'm not that sort of  person so imagine my delight when I found something that I could do. 

Through a face book friend who is a carer in a home for the elderly I discovered a local project which provides handmade items for patients in care homes and hospitals. Things like lap blankets, bags to fit on walking frames and fiddle mitts. Also called twiddle mitts.

I had heard of these but didn't know much about them so did some research and discovered that they provide stimulation and relieve stress in dementia sufferers. The bonus is they are also fun to make! I know that a lot of people who read my blog are makers so thought I would tell you how to make them. They only take a few evenings and can be given to a friend, relative or local care home. This is a front and back view of the one I have made.

As you can see there are lots of different textures and shapes as well as bits and pieces to stroke and fiddle with.

To make one you first need to knit or crochet a rectangle approx 12 x 24 inches. Decorate one half of one side of the rectangle with things like buttons, flaps, ribbon, tassels etc. anything that feels nice but make sure they are sewn on very securely. This will be the outside of the mitt. 

Leave a gap of about 2 inches and decorate the other half of the same side. This time make the decorations all soft as they will be next to the wearers arm.

Next you need to sew up the long edges of the rectangle so you have a long tube. Tuck the softly decorated half of the tube inside the other half. Now you have a double fabric with decoration inside and out. Stitch or crochet the bottom edges together and run a line of stitching round the top to keep the fold in place. I decided to add a crochet frill at the wrist end but that is not necessary. 
This is the inside of the mitt.


I think I will make a bag to fit on a walking frame next as my mother had one and said it was really helpful as you can't carry things whilst holding the frame.

Happy stitching!

Wednesday, 28 July 2021

Some of my favourite flowers

 My favourite flowers are not the double blooms with showy flowers but the tradition cottage garden ones. I think the bees prefer them too. I also like to bring some indoors, especially the ones with scent as well as beauty. 

I have just made a felt with my favourite combination. Old fashioned Calendula always look bright and cheerful and I have some deep purple sweet peas which are almost black and have the most amazing perfume which you can smell as soon as you enter the room. The variety is called Winston Churchill if anyone would like to try them .Lime green  Ladies mantle makes a zingy addition and Ami major, which are a sort of domesticated cow parsley, add structure. Here is the felt.


I have added lots of french knots to help describe the ladies mantle and free machine stitch makes the calendula pop.

Wednesday, 21 July 2021

                                                 A use for my eco printing!

 Last time I posted I had been experimenting with eco print and made some samplers. It is quite an addictive pass time as you don't actually know what you will get until the bundle is unwrapped. Naturally, I wanted an excuse to continue but fabric (especially silk noil) is expensive.

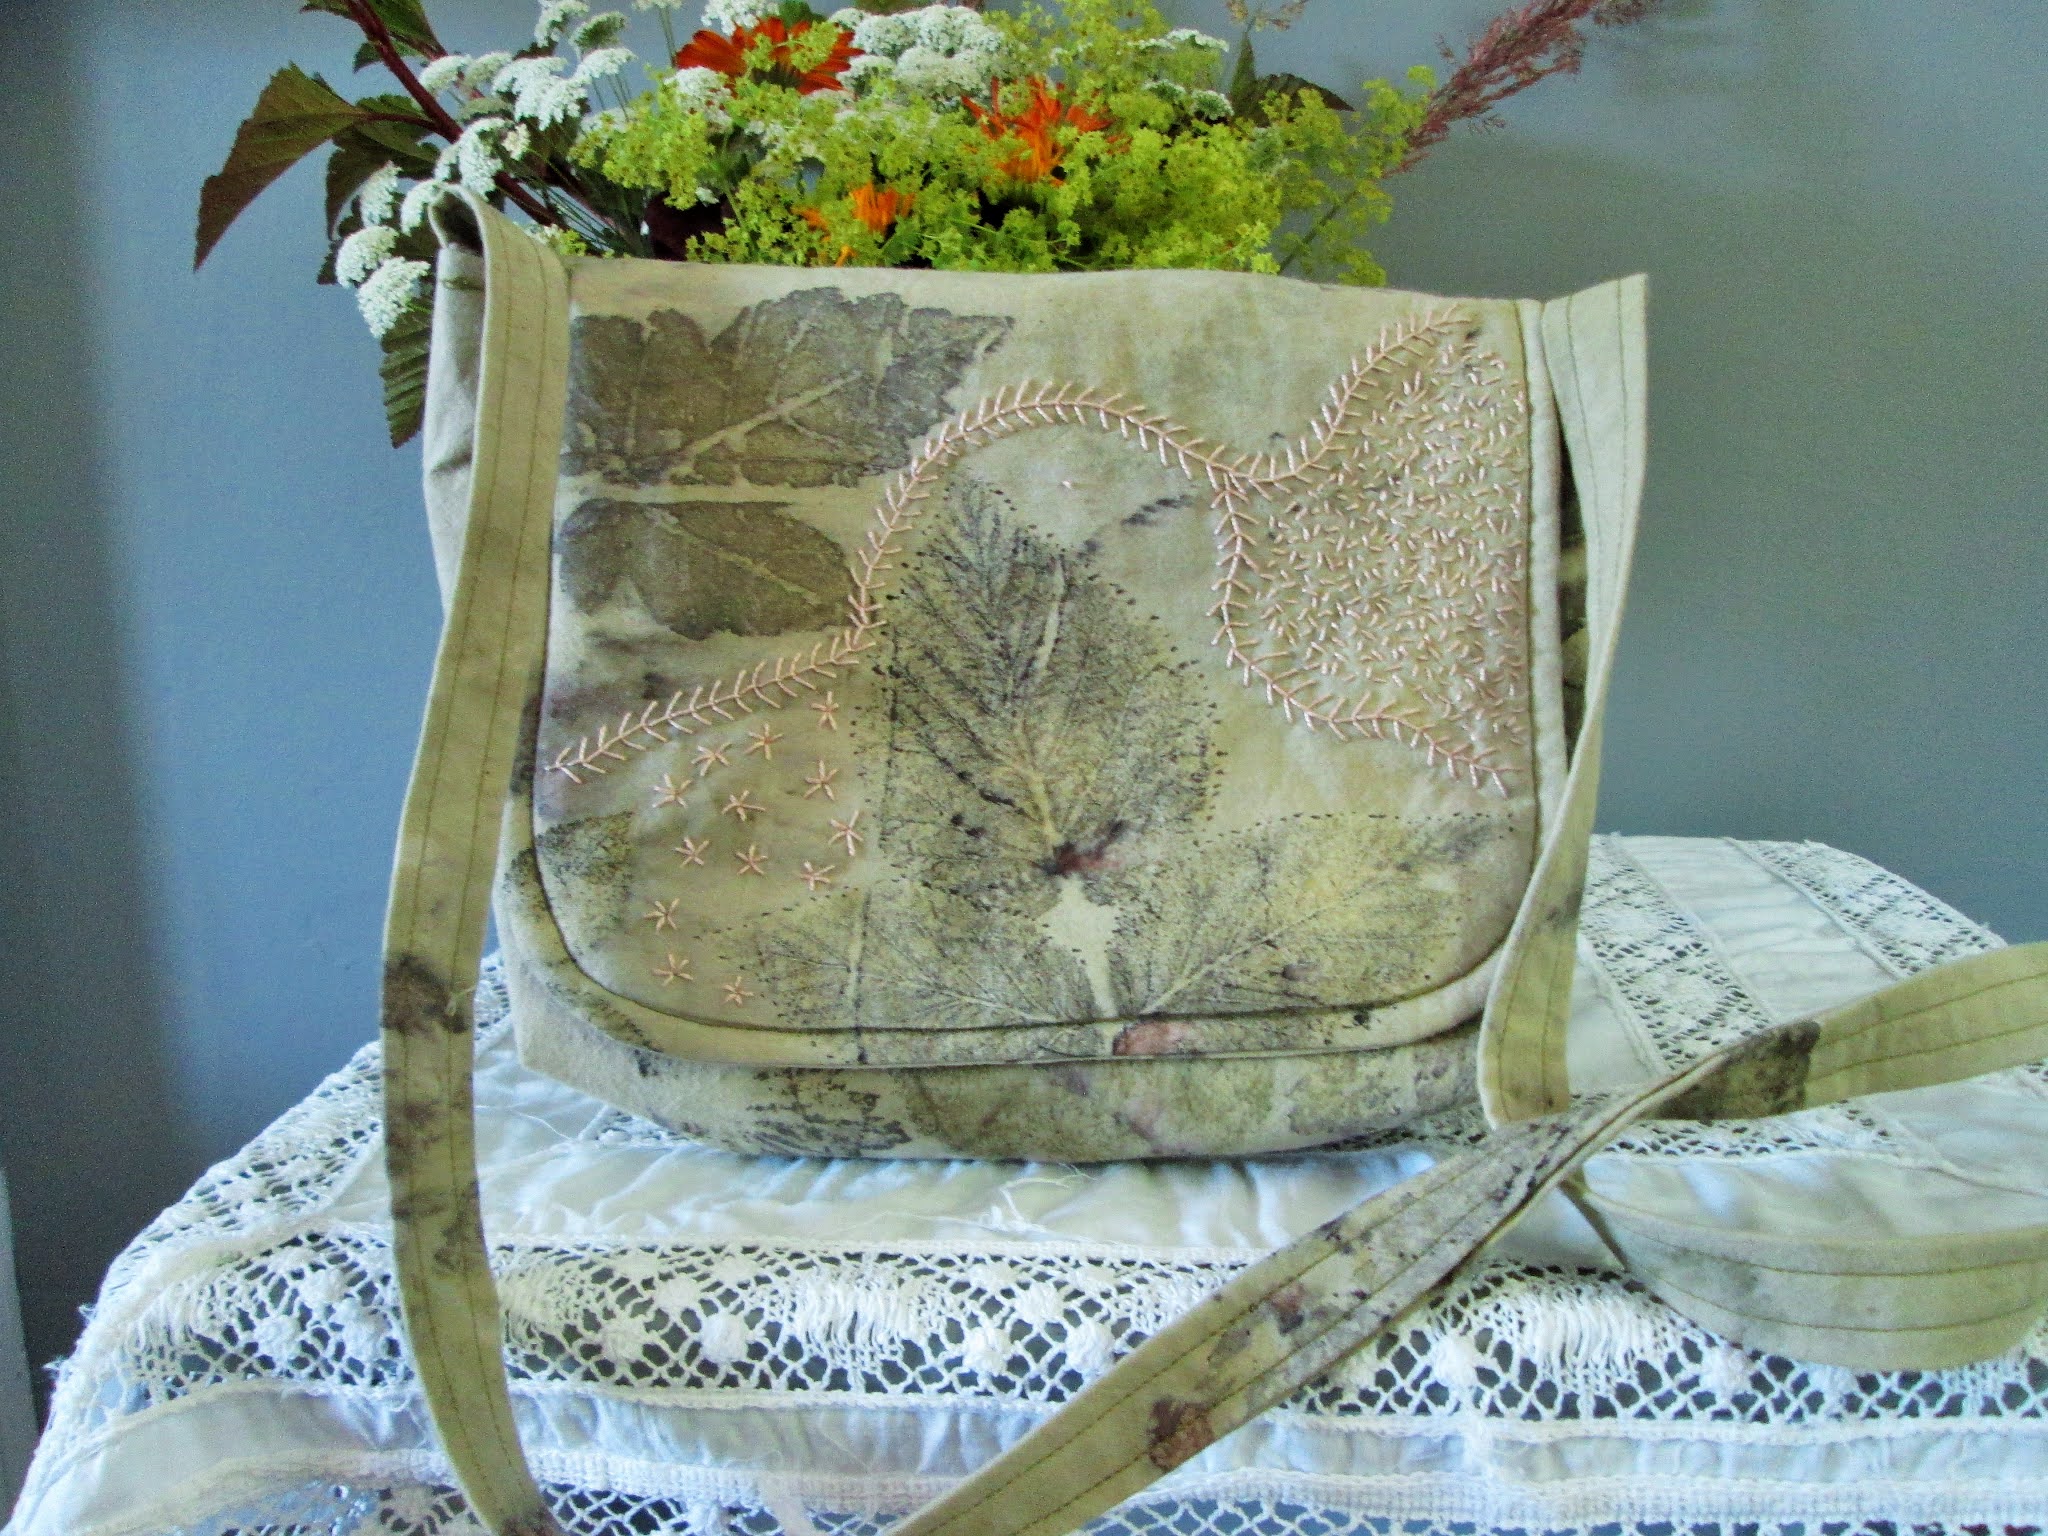
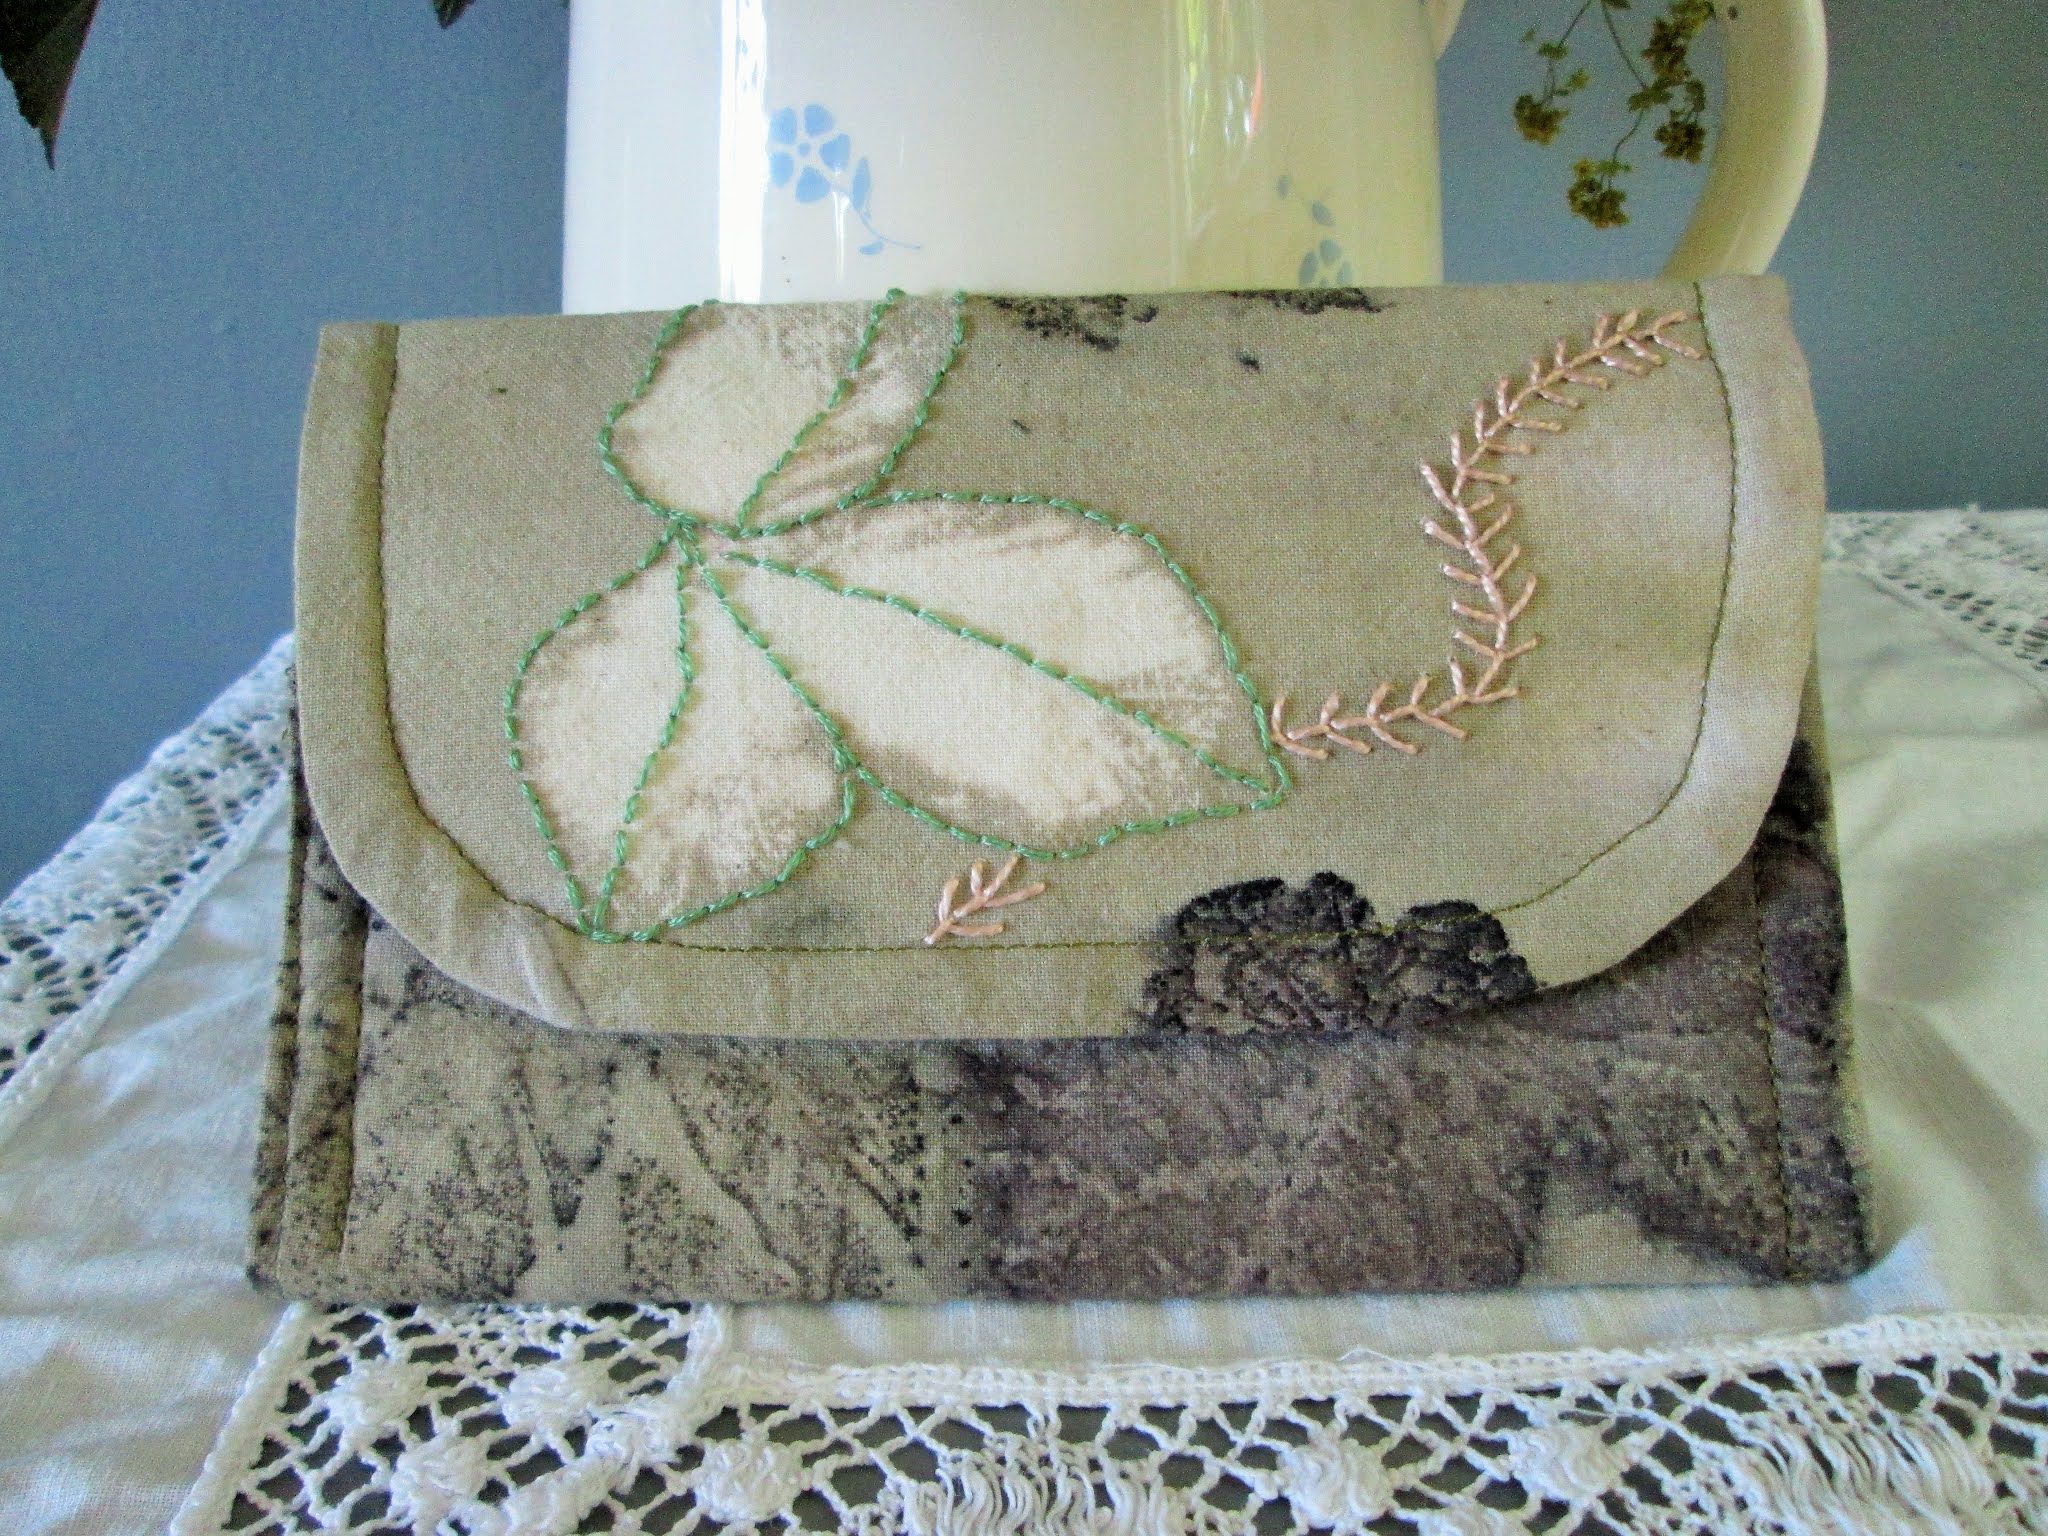
I made myself a bag and purse with some of the fabric and had so many comments on it I decided to make more for my shop. Hooray! A use for my fabric and a possible income to buy more. Some of the bags and purses are silk and some are cotton.

Here are a few of them. More can be found in my etsy shop.


Each time I dye only enough for one bag and one purse so there is usually a matching set and all are completely unique. The green, cotton bag and purse were first dyed with a dye I made from nettles and then steamed with leaves from the hedge row. They are made from cotton so are vegan friendly. 

Next time I dye a batch of fabric I will try to remember to take photos so you can see how it's done.
 

Tuesday, 29 June 2021

Eco printing on fabric with embroidery

 Hi everyone. It's been a few months since I last posted as we have very sadly had a family bereavement and I was dashing to and from England for hospital visits and a funeral. To be honest I didn't feel much like working anyway.

However, I am now getting back to work - and play. I have listed several more felts in my etsy shop. I was delighted that three sold within days ! Two of them went to repeat customers which is always nice because I know that they must have been very happy with their original purchase to have come back for more.

I'm waffling. Let me tell you about the eco printing. In case you've not come across it before it's a process where you mordant either paper or fabric, place leaves and flowers on it and steam it for a couple of hours. The leaves and some flowers leave a print on your paper / fabric. 

I have had a lot of success with printing on paper before but been disappointed with the results on fabric so I decided to take an online workshop. What a difference! Instead of looking like someone screwed the fabric and rubbed it in dirt I have leaf prints.

I started with cotton. It's not the best for this method but it's inexpensive and I had some. The prints were there but quite faint so I decided to add embroidery. I love the result. Here are photos of my samplers.

This is the first one. It was done on plain, white calico. I added both hand and free machine stitching. I also put some wadding on the back to make the stitches give more depth.
This is the second one I made. The background is actually a peachy, beige but doesn't show well in the photo. It started as plain, white calico but I dyed it with coreopsis before printing. Coreopsis gives a bright orange but the iron water I used as a mordant modified it.
Close up of stitching. Both machine and hand embroidery.

Close up of the second one which was all hand embroidery.

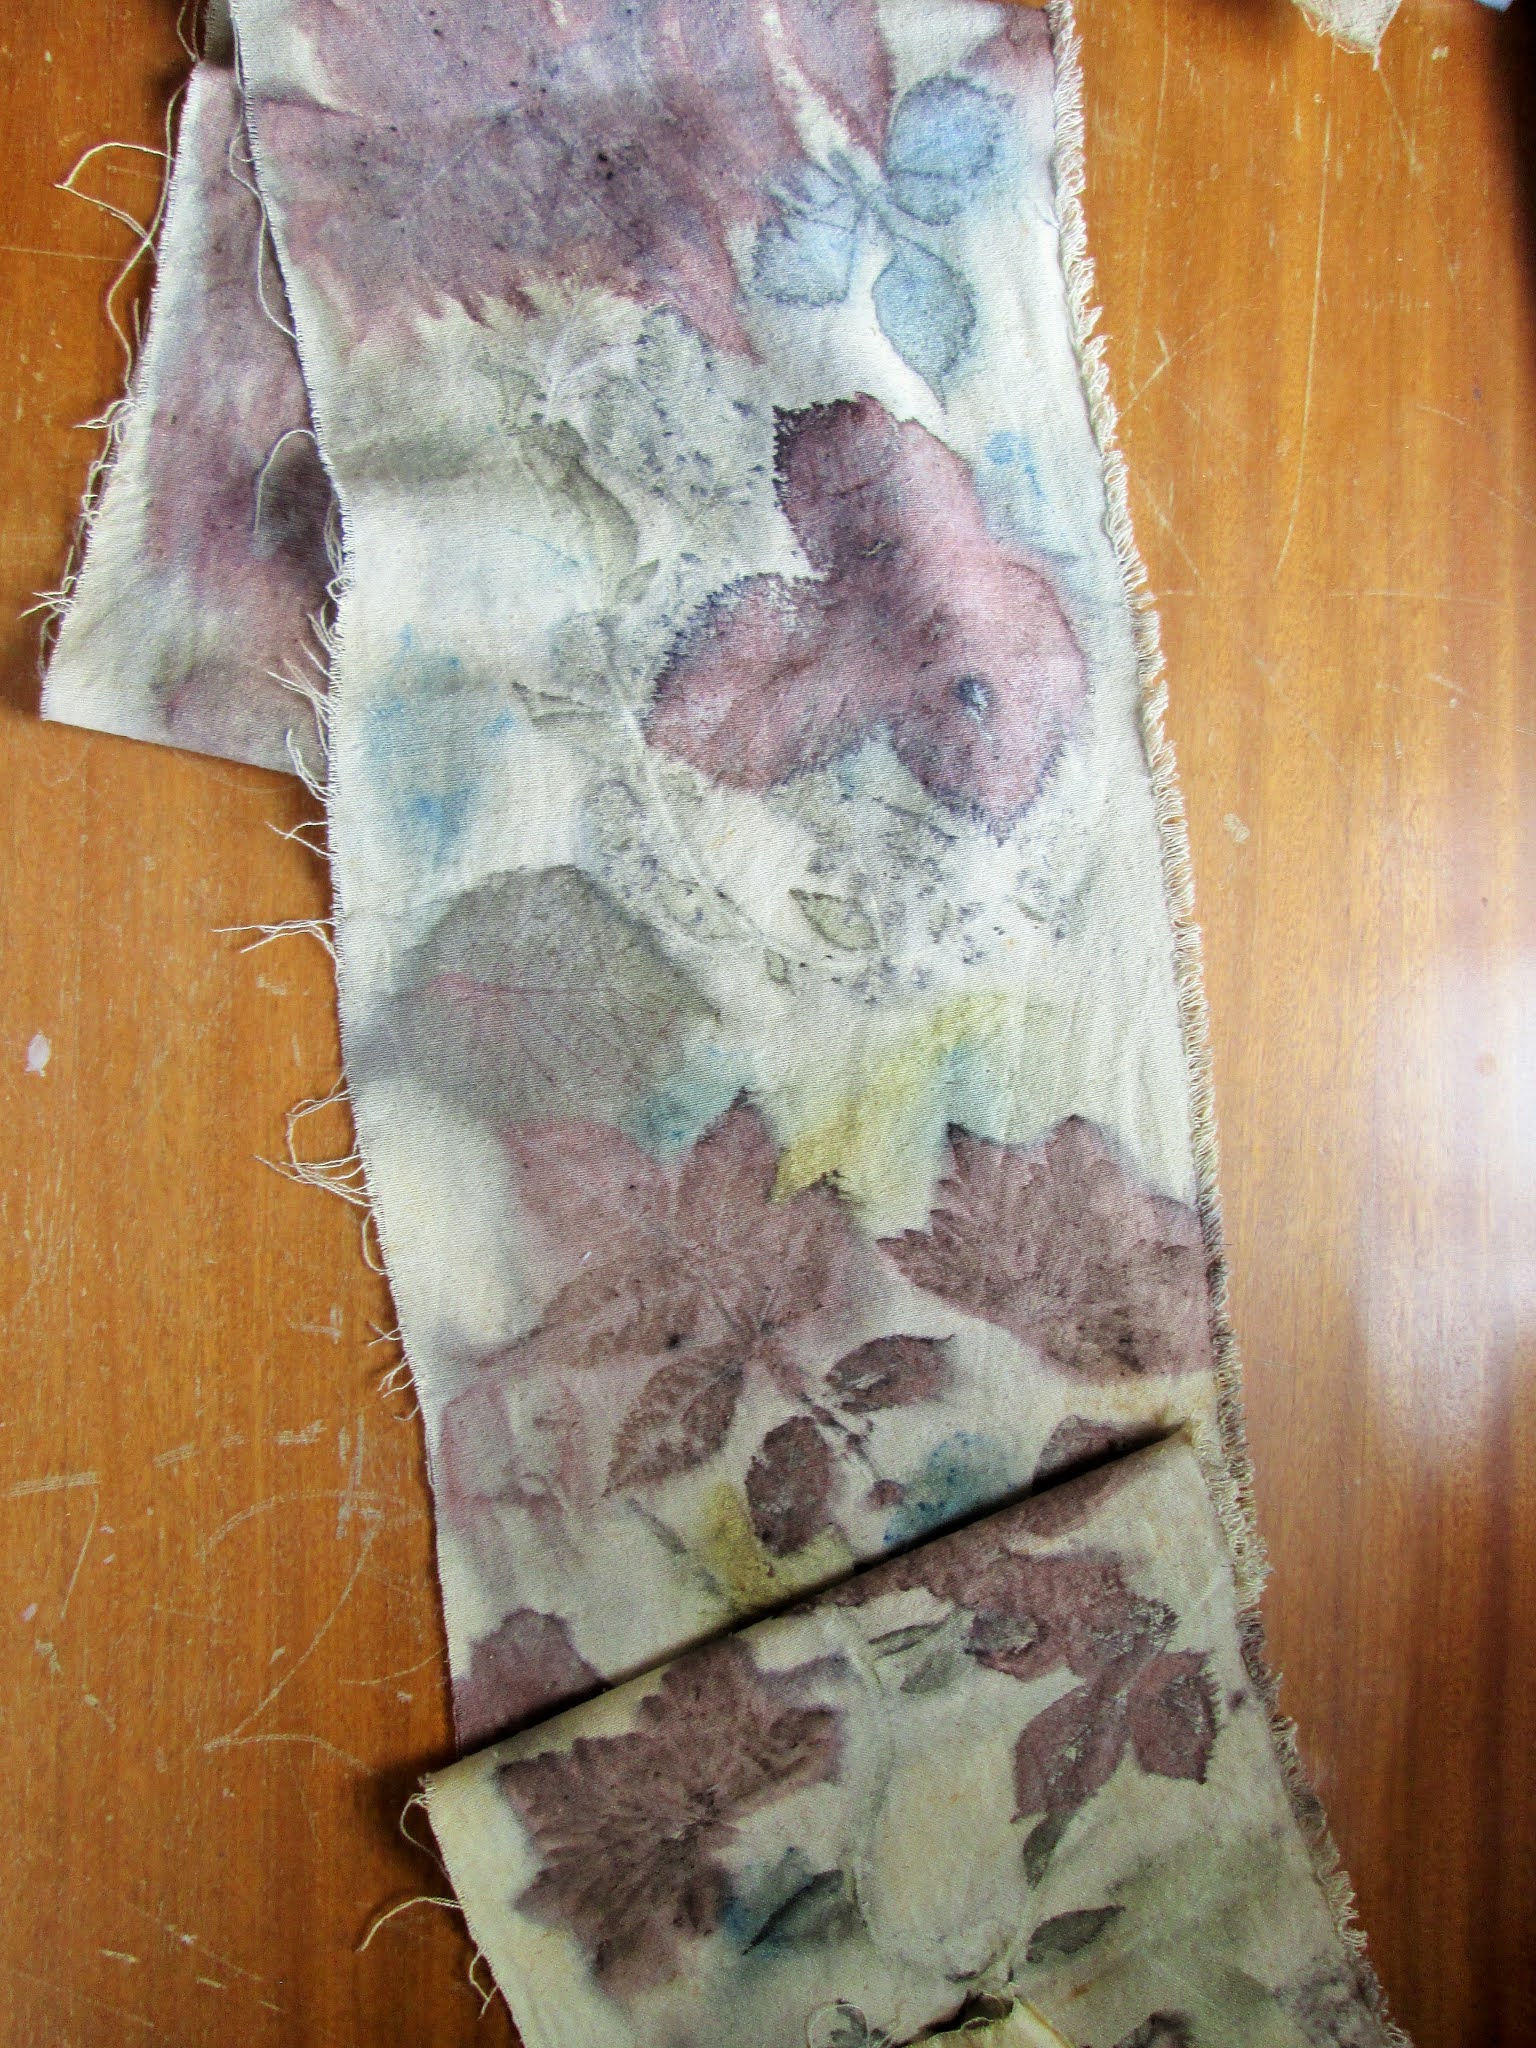
After having a bit of practise I treated myself to some silk noil. Gosh! Look at this.

The prints are so much clearer. I think it is a little too dark so today I am trying more silk with less mordant. It's so exiting when the time comes to unwrap the bundles and see what has happened.

I've no idea what I shall do with all of these prints but I'm sure I will think of something. I'll keep you updated when I do.


Monday, 22 February 2021

Embroidered portraits

 I know that everyone is missing their families during lock down and I am no exception. We managed to see our 3 daughters in between lockdowns last year but I haven't seen my mother or sister since last February. In a week it will be a whole year!

After watching 'portrait artist of the year ' on TV I wished that I could paint portraits of my family but, sadly, I am not much good with a paintbrush. Then I wondered if it would be possible to embroider a portrait because I do know how to use a needle. After trawling the internet I discovered that a few people do make them so I decided to have a go.

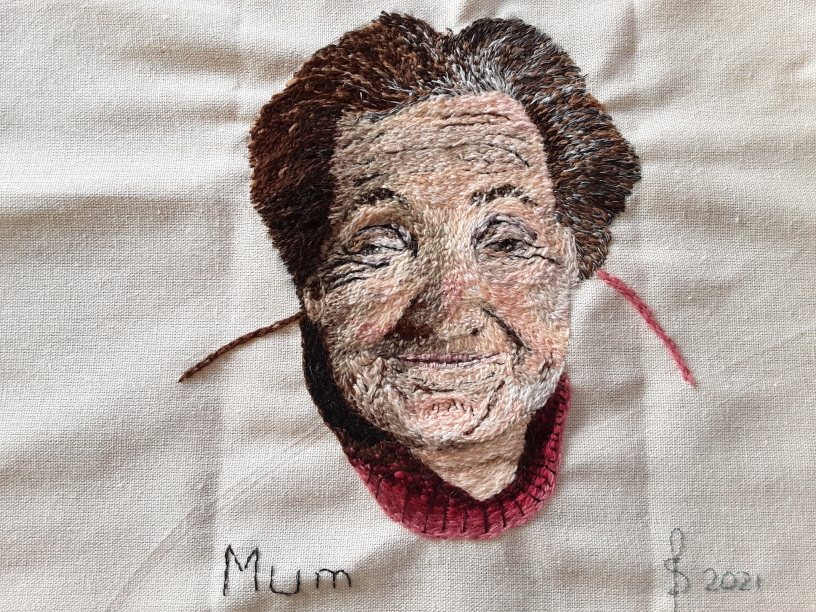
My first attempt was a self portrait as a sort of warm up piece. It was recognisable but not great. I did learn from my mistakes however so decided to have a go at my mum. I am actually quite pleased with this one.

I used mostly crewel wool on linen but didn't have all of the colours I needed  so improvised with stranded embroidery thread and even machine thread doubled up. It was kind of magical seeing her face appear beneath my needle.

I am attempting a portrait of my husband next but that is proving to be much more problematic as he has a more olive skin tone and I really don't have those sort of colours. I wish the shops were open!
Anyway, I will show you that one when it is finished.


Monday, 15 February 2021

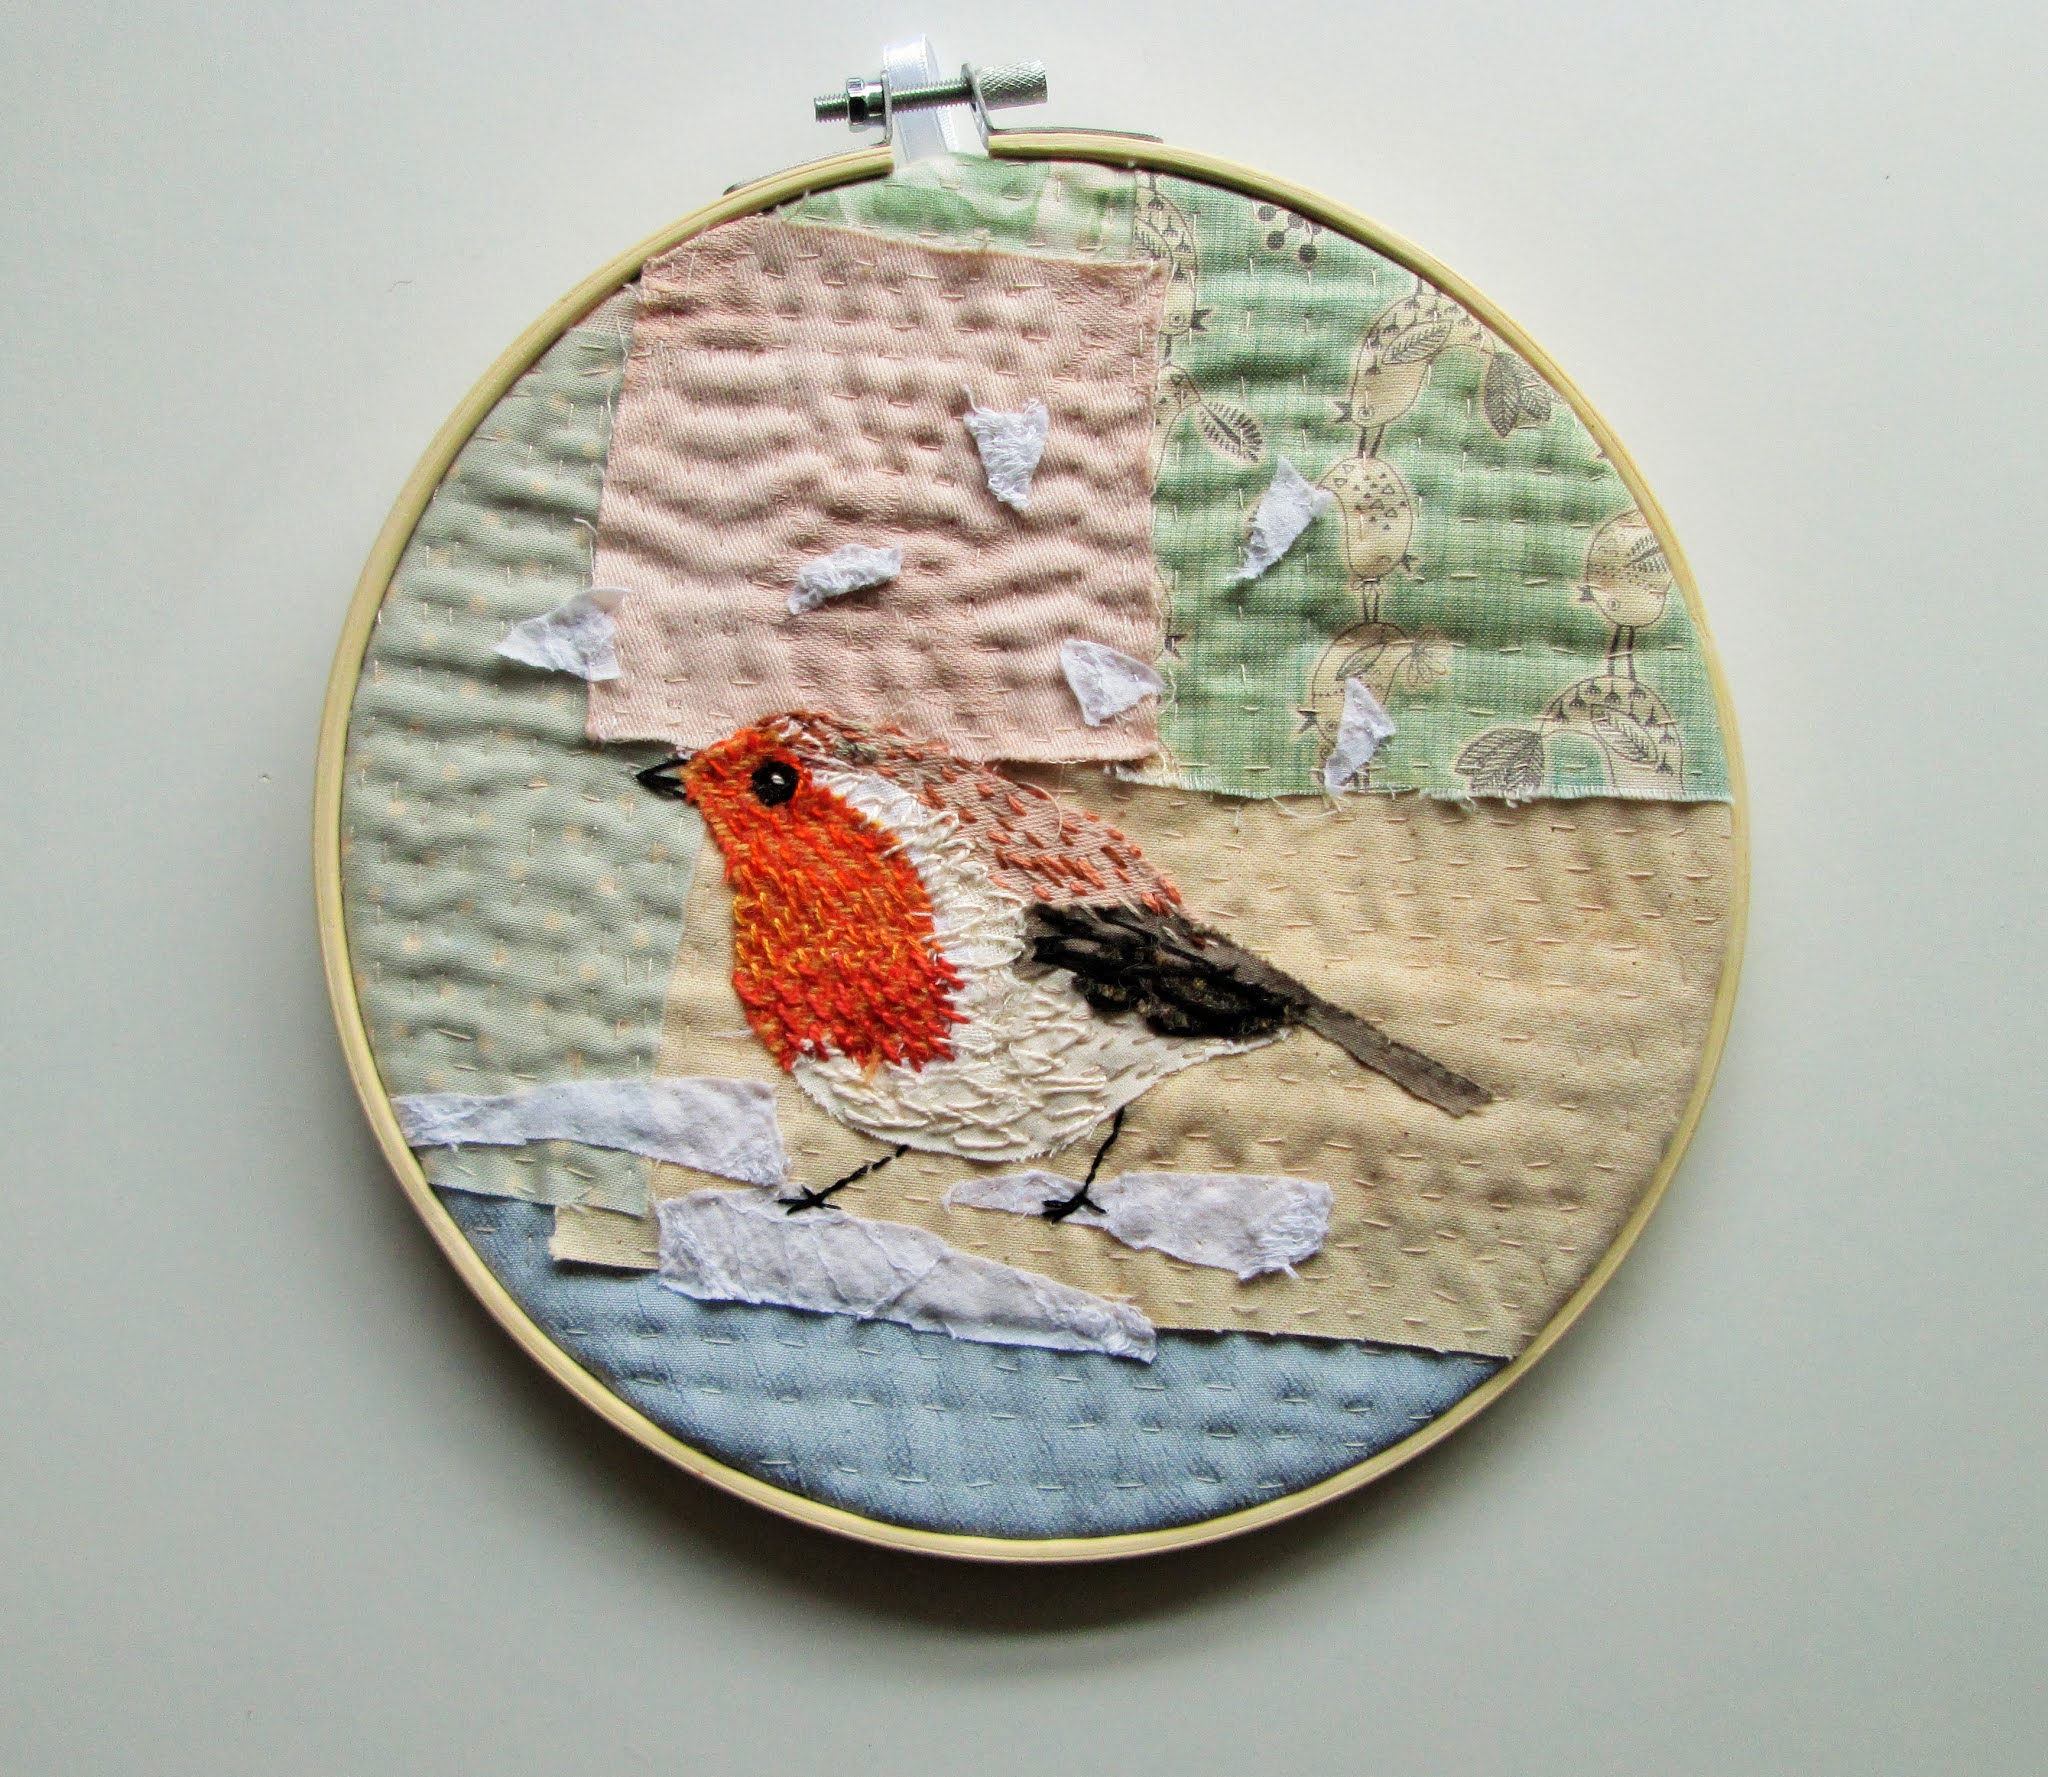
Slow stitch . Garden birds in lockdown.

Like a lot of other people I have been looking out of the window a lot more than usual during lockdown. We always put food out for the garden birds and enjoy watching them but with more time I noticed how even the birds that look drab from a distance have beautiful markings.

I considered including them in a piece but my mind was made up when a small flock of long tailed tits moved in. They are not common around here and there was great excitement in the Forey household !

Eventually I decided to collage them on an interesting background and add lots of stitching. 


A robin in the snow.

Close up of a house sparrow. This one is also framed in a hoop.

The long tailed tit.
These took ages to make but I found all of the hand stitching really relaxing. The rhythmic  act of slow stitching is one of those things that soothes and makes me forget the madness going on in the world.

I also enjoyed picking out the fabrics from my left overs stash to make these pieces. The only bit I didn't enjoy was enclosing the back to make everything secure in the hoop and tidy.

Reverse side of hoop.

These are all currently available in my etsy shop. There are also more photos there if you want to take a look.

Next time I will tell you about another project that was bought about by lockdown. Nothing for sale on that one but you might be interested in trying it yourself.


Monday, 8 February 2021

Catching Up

 It's been a very long time since I've written the blog so I thought we should do some catching up before getting down to business.

The first thing that happened was my youngest daughter got married !

Her husband is lovely and we really feel that we've gained a son. 

Next my husband and I decided that we were getting too old and creaky for smallholding and we were rattling around the farmhouse. Time to down size. We have only moved about 5 miles but have left the hills and now live on the edge of a village just a mile from the sea. I do miss smallholding but it's nice to be able to walk to the beach and post office plus have really nice neighbours. These are our nearest neighbours.


As always in a new home, there was lots to do. Particularly in the garden . One of the exciting things that I am doing is planting a dye garden. Last year I made an 'eco jumper'. We were in lockdown but I managed to obtain some very nice fleece from a smallholder in the village where we used to live (socially distanced of course ). I then dyed the fleece with plants either from my garden or collected on daily walks. Next in the process was spinning the fleece which took ages. When I had finally spun around 700 grams of fibre I made a crochet jumper. All I had to buy from outside the area was a small packet of alum for mordanting the fibre. 


Lovely soft colours offset by the bright orange which came from dyers coreopsis. 

This is the finished sweater.


 I have still been working and you will find lots of felts in my etsy shop. To have a browse click on the etsy banner at the top of the page. I also have some new products but I will tell you about those next time.

Friday, 5 January 2018

weaving with my hand spun yarn!

Last time I showed you how I was creating a tweed effect yarn. I am excited to tell you that I have almost finished weaving the cloth for my jacket. Actually, I thought I had finished but when I started to piece the jacket I realised I need a little more cloth to make the arms wider for ease of movement.

I have read that you can't use hand spun yarn for warp threads because it will break. I wanted to get around this and racked my brains for ways of making it stronger without core spinning. Then I had a light bulb moment - felt it of course!

To do this I washed the yarn after spinning and whilst still wet held one end of the skein and swung it so that the other end bashed against a table. Then I moved my hand round and bashed another area and so on. If you try this be sure to keep checking the yarn to see if you have achieved the degree of felting required and make sure the strands of yarn don't felt together. It only needs to be a little stronger and not totally felted.

My loom is a Brinkley loom. I used to have a rigid heddle loom but hated warping up so much that I sold it. This loom has a continuous warp and can be set up in about half an hour. I have the smallest one available because I didn't know if I would enjoy using it. In hindsight I wish I had bought a larger one. Here is my Brinkley loom with some of my weaving on it.
This is my finished cloth. I hope to complete the jacket in the next few weeks and will update you accordingly.

Monday, 20 November 2017

How to card for tweed hand spun yarn.

For months now I have been drooling over Saori style jackets but don't have a spare £500. Then it occurred to me. I have access to fibres, I can spin, I can weave and I can sew! Why not have a go at making my own?

I decided on a sort of jazzed up country tweed look predominately brown because I have brown boots. I also have a brown alpaca fleece, a brown soay fleece and lots of bits and bobs of other colours from my felting. When I'm felting I often have odd bits of fibre left over that I put in a tub meaning to use later but I can never find the colour I want and end up throwing them away when the tub gets full so I decided to use some of those for the tweedy bits.

I gathered everything together along with my drum carder.
In order to make the yarn mostly brown I decided to make a sort of sandwich. I carded my brown fibres together and laid them on the table then selected my tweedy colours. I decided to use colours that are in brown like reds and oranges and rusts but then decided to throw in some purple and pink for good measure (they both contain red after all) . Then thought I would need a contrast colour so added some green!

These were all randomly carded together in to a batt and placed on top of the brown.
Yum! I also added some silk fibres which I have in my stash. They were pale green and pink. I then carded more brown fibres and put them on top of the colours to complete the sandwich. 

Each sandwich was then run through the carder again to blend the colours slightly. I had about 9 so ended up with arm ache but it was worth it.

I split each batt a few times length ways to make them manageable and sorted them in to two piles because I wanted to spin a plied yarn and needed to make two equal length of singles. I then spun them just as they came.

The light was not good for photos but I've done my best to show you the finished yarn. In reality the colours were much richer. They look a bit washed out in the photos but you can see the tweed. Here they are still on the bobbins.
And here is the yarn after plying,
washing and setting the twist.
I'm really happy with it and can't wait to see how it looks when woven. Of course, I have a lot more spinning to do before there is enough for a jacket and I will probably spin some other yarns which contain the same colours but in different quantities so I have variations.
If you want to try this but don't have a drum carder you could achieve the same result with a mixing board or even hand carders.

I will keep you updated on this project and show you the cloth I weave with this yarn next time.

Wednesday, 18 October 2017

mini felted paintings available

Just a quick post today to let you know I am trying to be organised for Christmas are you?

I have started making some  gifts for my own family and am beginning to make some affordable gifts to go in my shop. As well as the butterfly brooches I am trying to get some mini felts made. They are only £18.00 each and make a really unusual and original gift for a friend or family member.

The first one has already gone to a customer in Australia but here are a couple of the others available and I hope to have more soon.

Thursday, 5 October 2017

Tutorial- free machine stitch with soluble stabiliser

Hi Everyone,
Last time I posted I showed you a free machine embroidered leaf which I had stitched using water soluble stabiliser and promised a step by step tutorial. Well, here it is! This time I made a butterfly.

You will need

organza or other fine fabric
pencil
soluble stabiliser with adhesive backing
machine embroidery hoop
thread
scissors
sewing machine with feed dogs lowered and a walking foot

The first thing you need to decide is what image you are going to make. For this technique I feel that something delicate is appropriate. Maybe a decaying leaf, insect or a flower. You probably have ideas of your own and I would love to know what you create.

First you need to draw the image on to the stabiliser. If the image is complicated or you are not confidant at drawing I think you could probably trace something as the stabiliser is quite thin.

Next peel off the sticky backing and adhere to your fabric. Being careful to avoid
creases in your fabric.
Here is mine in the hoop. The image needs to be well away from the sides of the hoop or the sewing foot will catch. If the whole image does not fit don't worry as you can re position within the hoop as you go. Be sure to lower the feed dogs on your machine and if possible use a walking foot. You need to be able to move the work in every direction not just forwards and backwards.
Next stitch around your pencil outline. I prefer to use black or a dark coloured thread. Be aware that the bobbin thread will show through when you have finished so make sure it is the same colour as the top thread. If you want to make gradual colour changes you can do this by keeping the bobbin thread the same and changing the top thread only. As you may see in this photo I had some problems with my tension at first. I usually stitch on felt and had to tighten the bobbin for this much thinner work.
When you have completed the area in the hoop move to the other area.
Next comes the colour. Begin to fill in your image one colour at a time.
Continue with each colour in turn until your image is complete. Don't try to cover every tiny gap. Those tiny gaps create the delicate, lacy effect. You should, however try to ensure that your stitches all meet up with another stitch especially around the edges.
Can you see the light shining through the small gaps I have left?
Almost there now. Remove the work from the hoop and fill a sink or bowl with warm water. Immerse the whole piece in the water. The paper will magically dissolve and you will be left with your embroidery on the fine fabric. You can soak for a fairly short time and the embroidery will retain some stiffness which can be a good thing if you want it to stand proud when you mount it. The leaves I made were only sewn to the paper down the centre vein. If you want your work to be soft you may have to soak several times in clean water.
Here is my embroidery once the paper has dissolved.

Now leave it to dry and then carefully cut the excess fabric away. I prefer to use small embroidery scissors for this as it can be quite fiddly and you need to be sure not to cut the stitching.
Here she is all dry and cut free from the surrounding fabric! I haven't decided if she will be part of a felt, mounted on Khadi paper and framed or perhaps be turned in to a brooch. I will be sure to let you know what she becomes when she grows up.
One last thing I should mention is that it is possible to use this method to create an embroidery with no fabric at all. Your stabiliser will not need to be sticky and you must be absolutely sure that all of the stitches interlock.
Have fun and if you have any questions please feel free to ask.

Thursday, 28 September 2017

Free machine stitching with soluble stabiliser

Hi everyone,
Recently I have been experimenting with water soluble stabiliser. It's really useful to create something light and lacy with free machine embroidery. I wanted to create some autumnal leaves and thought it would be perfect. Here are some photo's of  one. Framed and a close up.
I used white organza as a base which peeps through the stitching and gives the effect of a light dusting of frost sparkling on the leaf. They are mounted on Khadi paper which has a wonderful texture and is made in India from recycled cotton rags. Although they could just as easily be mounted on fabric this creates a nice contrast. If you would like to see more photos pay a visit to my etsy shop.https://www.etsy.com/uk/shop/SueForeyfibreart?ref=seller-platform-mcnav

I plan on making more and will take step by step photos so I can post a tutorial for anyone who wants to give it a  go.

Thursday, 8 June 2017

studio and craft room organization.

Hello everyone. Today I thought I would give you a peek in to my studio and tell you about an easy, inexpensive storage solution I found on pinterest. First I will show you a video of my studio. Apologies for the grainy images.

As you can see, I have separate areas for felting and stitching. That way I have the luxury of leaving half finished projects out. I love the simple merino storage. It's just a rod suspended on cup hooks with the merino batts draped over the rod. I can see what I have at a glance and the vibrant colours really brighten the room up. I have a big, old cabinet for paperwork, mounts and general bits and pieces. Did you notice the under stair shelving? That is what I want to tell you about.

Until last weekend all the baskets , the old sewing machine, Gloria (the mannequin) and everything else were scattered around the worktops in my studio. I even had some under the table and to be honest it looked a mess! I couldn't find things and always seemed to be moving things from place to place to make room. So I visited my favourite inspiration site - Pinterest.

There were loads of amazing and very inventive storage solutions but many were not suitable for my needs and others were just too expensive. Until I came across this brilliantly simple idea.
                                                             
 Apple crates!

They could, of course , be arranged in different ways but this fitted well into that wasted space. They cost 6.00 each from a local hardware shop. All I did was sand them down and give them a couple of coats of clear varnish. They could be secured together but I wanted the freedom to be able to move them and rearrange them. They are firm and stable just as they are.
Can you see Gloria looking after the knitting needles?

The neat little chest of drawers was a plain Ikea one which I painted years ago. Perfect for stationary.
I hope this has given you some ideas on how to sort your craft room out.


Thursday, 25 May 2017

Hand spun art yarns now in my shop!

I have a confession to make. I have become addicted to spinning designer art yarns!

This is quite a long post so get a cuppa and sit down. I will tell you how this came about.

It's almost shearing time and I decided to use up last years fleece I would spin it and make myself a cosy sweater for next year. I learned to spin about 20 years ago but have always found it a bit boring. Felt making is much more exciting. I spun my yarn. Just a plain white 2 ply with some hand dyed pink and blue stripes for a bit of interest and knitted my sweater. I've never been a great knitter but to my surprise discovered I have finally learned enough patience to finish something and in about 4 weeks had my cosy sweater.

Then some friends in the village asked if I wanted any alpaca fleeces because they had some spare. I didn't want them to go to waste so said yes and ended up with a white fleece, a brown fleece, a beige one and a black one! My next door neighbor also has a few sheep and also spins but knew she wouldn't use the fleece before shearing and hey presto I have ANOTHER fleece to spin!

This was getting silly. Am I mad? Better make another sweater. This time I carded the brown alpaca with some brown soay which I had left. I also found some light brown shetland in my stash and threw that in the mix. I ended up with a rather nice tweedy sort of brown. I dug out a spinning book that has been gathering dust for years and found a yarn which the author had spun using a hand spun singles plied with a fine commercial thread. Mmmm I have a mill end of rust, silk fibre on the shelf. I plied my tweedy brown hand spun singles with the rust silk and ended up with a really nice yarn!

After knitting the front of my sweater I decided that it needed something to jazz it up a bit but don't like knitting fancy stitches or dealing with multiple balls of yarn so I scoured the internet for ideas. This is when I discovered ART YARN. Perfect. Lots of texture and multiple colours all in one ball. However, when I looked more closely they were too - well big. Too thick and too much texture to look right on my sweater so I decided to make my own. Lots of reading and many you tube videos later I  began. Of course I wanted to try lots of techniques and experiment with adding silks and Wensleydale locks and..........

I ended up with this lot
They are all beautiful. Chunky but not too thick to knit, crochet or add to a weaving comfortably. 
I think these are my favourites
Or is it these?
It would take me a month of Sundays to use all of these yarns and I 'm still spinning so I've added a new section to my shop for them. If you need to expand your stash or want something for a special project visit the new yarn section by clicking here
 https://www.etsy.com/uk/shop/SueForeyfibreart?ref=seller-platform-mcnav&section_id=21680641       so far I've only listed a few but more will be coming in the next few days. Happy creating!

Tuesday, 23 May 2017

Bed hangings - to keep out the cold!

I was recently asked to make some felt bed hangings for a little girls bed which was in a drafty room. The customer had previously commissioned a picture for the side of the bed and now wanted one for the head end and one for the feet end. Each one had to be 102cm x 68cm .

We had a lot of fun designing them together and these are the results.
Felts of this size require an awful lot of rubbing and rolling and certainly gave my arms a workout! I'm sending them off tomorrow and hope she loves them.

Wednesday, 17 August 2016

How to make a hexie quilt using English paper piecing.

Today I thought I would give you a little tutorial on English paper piecing.

I used to make lots of quilts but my favourites are getting worn and needing to be patched so I decided to make a new one. There's nothing quite like snuggling down with a quilt on the sofa on a cold winters night to watch a good film. I have made some 'clever' quilts in my time with intricate designs but realised that I prefer the plainer, more traditional ones so I decided to go with a scrap hexaginal quilt with a vintage feel to it. It turned out I didn't have enough scraps so I did end up buying fabric but only in fat quarters to retain the scrappy feel.

This method of quilt making is not for the faint hearted or anyone that wants a quilt in a hurry. It's a slow process but if you enjoy hand stitching it can be pleasurable. It is also very portable!

Many of these quilts are made with tiny hexagons but I didn't want a UFO on my hands so I have used hexagons with sides that measure 3 inches. This is how far I've got so far. It is about five feet long and still has some growing to do.
Paper templates are the first thing you need. Each one needs to be the size you want the finished patch to be, without seam allowences. These can be purchased already cut or you can make your own. I prefer to make my own and use paper from old magazines. If you decide to make your own and don't know how to draw a hexagon there are many tutorials online. I would suggest that you make a template from cardboard and use that to draw around. If you draw around papers that you've already cut they will slowly get bigger.

Next you must cut your fabric out. To get the correct size pin a paper template on to the reverse side of your fabric and cut it about 1/4 inch larger.
Now using the paper template as a guide turn the edges of the 
fabric and stitch to the paper with large tacking stitches in a contrasting thread. These stitches will be removed later.

Before you know it you will have a stack of hexagon patches basted to paper and ready to be joined!
This is the tricky bit! Hand stitching is not usually as strong as machine stitching so your joining stitches must be tiny and very close together. 
Take two patches and place right sides together. You need to stitch along the edge where the fabric turns over the paper. Try not to stitch in to the paper. I have used a neutral cotton on this quilt but if you are using strong colours you may need thread to match. Use a good quality thread which is strong. I always make two stitches in the corners or even a blanket stitch as this will be the weakest point and more likely to come apart as construction commences. I've taken a photo of the tiny stitches but am not sure if they will be clearly visable.
You can join your hexies in rows or you may prefer to start with a central patch and work out from it. Remember every time you come to a corner to add an extra stitch or two for strength. When a patch is joined to another one on all sides you can undo your taking stitches and remove the paper. Do not remove the papers from the outer edges which have not yet been joined to another patch.

Whilst you are stitching all of your patches together you will have plenty of time to think about edges and borders. I intend to have a plain, cream border and then some more patches outside that but haven't decided on the edge yet. It can be squared up or left with a sort of zig zag edge which is what you get with the hexagons. If you want the edge squared up at any time. Either for joining a border or for the edging you will need some half hexagons to fill in the spaces. Just cut your papers in half and proceed as normal.

Before you embark on a project of this kind I recommend that you search for images of hexagon quilts because there are many patterns which can be made from them. Pinterest is always a good resource.

Oh yes I forgot to mention that I wanted my quilt to be a little different and slightly quirky so a few of the patches are made up of more than one piece of fabric. Some almost look like crazy quilting. I have kept this to a minimum but they are there on close inspection. See if you can spot any in this pic.
If you have any questions please ask in the comments box and I would love to see your creations as well. I will keep you updated but don't hold your breathe because it will take some time.