etsy mini

Wednesday 30 October 2013

Making paper with plants part 2

In my last blog we did the preparation for paper making and are now ready to go ahead and form sheets of paper.
In your plastic tray you need to make a mould. This is simply 3 layers of newspaper. Fold the bottom one in to a small rectangle, the next in to a larger rectangle and sit it on top of the first one. Next put on the top piece of newspaper which should be bigger again. Cover with a damp cloth and you should have a little hill.
Now in your other plastic bowl mix the pulp with enough water to scoop your deckle and frame into. I couldn't photograph this part as I only have one pair of hands!
You need to hold the deckle, net side upper most with the frame on top. Now scoop the deckle and frame in to the pulpy water mix. Start at a 45 degree angle and level out as you go. Shake from side to side and back to front as you bring it out of the water then hold it there until the water has drained out. The pulp should evenly cover the netting with no holes. If you have holes tip it all back in to the water and start again.

Move to your mould and tip the pulp out of the deckle and on to the mould.
Cover this with another piece of damp fabric and continue until all of the pulp is used up. Make sure to stir the pulpy water in between each sheet of paper so the vegetable matter does not all sink to the bottom.
The next stage is drying. With the paper still on the fabric take them and lay flat in a warm room to dry. This will take at least 24 hours. When dry peel the papers off of the cloths and hey presto! you have paper.
To be honest my paper was a little brittle and crinkly. I would not use broccoli leaves again. I have had success before with other vegetation though so don't be put off. Probably best to start with grass or hay.
Have fun!

Thursday 24 October 2013

How to maker paper from plants part 1

After my mixed media post in which I used handmade paper I've been requested for instructions on how to make it. You can, of course, make paper from recycled paper or buy pulp all ready to use but it is soooo satisfying to make it from raw products that you have gathered yourself.
Theoretically, paper can be made with any plant - fresh or dried but some make better paper than others. All types of grasses even dried in the form of hay make good paper but why not try something else and experiment? Have a look around your garden if you have one. If you are a city dweller check out roadside weeds and fallen leaves in the park. I chose to use the tough, outside leaves from broccoli plants because I have a lot of them in my vegetable patch. They were a nice reddish green colour and I thought they might make an interesting coloured paper. Do remember that the colour of your plant material will affect the colour of your paper so if you want writing paper use pale plant material.
Before you start there are a few things you need. Probably the most important . is your deckle and frame.
The deckle is a wooden frame covered in mesh and the frame has to be of the same size but without the mesh. This are the tools you will use to scoop up the pulp and shape it in to paper. You could use 2 picture frames of the same size and staple old net curtain to one.
You will also need a large stainless steel or enamel cooking vessel. I used a bucket. Also a large plastic vat. It has to be a bit bigger than your deckle. I used the sort of plastic tray which you can buy as a cat litter tray.You will need to some sheets of fabric also a little bigger than the deckle. Reusable kitchen cloths are OK and 2 pieces of board. If you are using edible plants you could use chopping boards. You will also need a solution to cook your plants in which will break down the cellulose. The best liquid is wood ash lye. For some people this may not be practical to make in which case you can add washing soda to your cooking water.A blender is useful too. If you are making the wood ash lye here is the recipe.
1 bucket of wood ash from a 100% wood fire
enough water to cover the ash
Make sure the room is well ventilated as this stuff smells!

boil the wood ash in water for 1/2 an hour and leave to soak over night. In the morning strain through some netting. KEEP THE LIQUID and discard the wood ash. You will end up with a disgusting browny pink liquid like this.

Next you need to pick your plant material. You can see my broccoli leaves here. At least a bucket full will be needed. Now you have to cook the plants in the wood ash lye. Use the stainless steel or enamel pot and bring to the boil. Cover and cook until very soft. Grass cuttings take at least an hour. My leaves took 1 1/2 hours. Make sure that they are covered with the liquid. If you don't have enough you can add a little water. Again make sure you have enough ventilation.
When you have very soft vegetation
you can strain. This time discard the cooking liquid and keep the plant matter. There will probably still be lumps of plant in the pulpy mass so whizz it through a blender until it looks like the picture above. If you do not have a blender you can put it in a large container and beat with a heavy stick - maybe a rolling pin.

Your pulp is ready to use! Next time I will post the actual paper making process. 

Tuesday 22 October 2013

Spotlight on Joanne Hawker

During the month of September Etsy UK organised a mentor month where we teamed up with another shop owner with different strengths to our own. I was teamed up with Joanne who helped me with photography. Here is a little bit about her and some samples of her work .

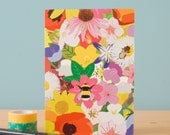
Set of 4 Blank Flowers and Bee's Notecards

1. Have you always wanted to be a graphic designer?
Yes I have actually! Well, except for a phase when I wanted to do Horse and Stable Management (I don’t even have a horse and my dad put a stop to that!) I knew from an early age that I wanted to do something in the creative industry because its always been a part of my life. In primary school for instance we hand bound all our own exercise books, made numerous lino cuttings, candles, our own classroom curtains, and I spent hours tracing images out of books. For Christmas my wish list was always full of creative kits! I only really decided on Graphic Design in year 10 when we had to make our GCSE choices.
2. How long have you been running your own business?
I graduated from university in 2010 so I opened my online shop then. However, it’s only really taken off in the last year when I joined Not on the High Street. It’s still very much a hobby. Before I opened my shop I was also doing the odd bit of freelance design work too.
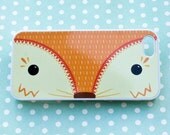
Woodland Fox iPhone 5/5s Case

3. What inspired you to open your online shops?
I found that I was creating lots of illustrations and patterns but didn’t have anything that I could do with them so I started to offer them up as prints. I thought that it was better to do something positive with them rather than hiding them away in a folder on my desktop. Not only that but I gave up on searching for a job in the creative industry because no one ever replied so I decided that eventually I will be my own boss.4. What part of running your own business do you enjoy the most and least?
The best of it is having full creative control. There’s no one telling me what I can and can’t design. It’s also lovely when customers leave nice messages about how much they like your work. That’s always a really big confidence boost. The thing I least enjoy is the paperwork! But I guess it’s got to be done!

5. How do you get ideas for your images?
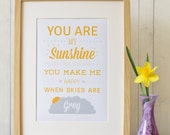
EVERYWHERE! It could be conversations, a weird dream or songs. But I mainly get my inspiration from the natural environment. You will see notice lots of flowers, bugs and animals featured in my work!You Are My Sunshine Lyric A4 Print


6. Do any other designers inspire you?
There are lots of people I find inspiring! Alice Potter, Alyssa Nassner and my good friend Emmeline Pidgen to name but a few. I follow a lot of pages on facebook and twitter too so I’m constantly being bombarded with pretty things which isn’t so bad!

7. Which is your favourite item in your shop and why?
At the moment it’s my iPhone cases! I had such fun making them. I pull a lot of silly faces anyway so these can only add to the fun! Now other people can join in too!8. What would you like to be doing ten years from now?
In ten years time I’d like to quit my day job and be my own boss full time in a nice little house of my own and a nice big office! That’s the plan anyway! I’ll get there slowly but surely. I’m determined!

9. Where else can you be found on the web?
Facebook: www.facebook.com/JoanneHawkerDesignandIllustration
Twitter: www.twitter.com/Joannehawker
Blog: www.origamichicken.com
Etsy: www.etsy.com/shop/joannehawker
Not on the High Street: www.notonthehighstreet.com/joannehawker
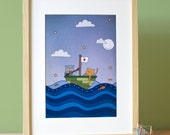
Wanelo: www.wanelo.com/joannehawkerThe Owl And The Pussycat A4 Art PrintWhy not pop along to Joanne's shop and see more of her work?


Tuesday 15 October 2013

Fun with mixed media

Yesterday I decided to play with mixed media techniques. As the leaves are changing colour I decided to base my design on an Autumn leaf. This is what I came up with
I'll tell you how I made it and you might like to experiment with ideas of your own.
As a firm base for the leaf I made some burgundy coloured felt with a few silk inclusions and whilst that was drying I set about making the textured background.
Materials I used 
Handmade paper, a brown paper bag, some silk carrier rods which had been separated into thin layers and some snippets from some hessian fabric. 
First I wanted to unify all of the elements so I made some strong, black tea and popped the carrier rods in it then painted the handmade paper with tea as well. I left the brown paper as it was but scrumpled it up until it was soft and nicely textured.
these all needed to dry as well so I began the leaf itself. I took the dry felt and chopped up all of the red fabrics I thought would blend together. I used silk, red ribbon, red scrim, red cotton fabric then added a little piece of orange silk and some chopped up gold thread. These were all bonded to the felt with bonding powder. You could use bondaweb. Next I took some sheer, red fabric. I think it is polyester chiffon. It MUST be a man made fabric so that you can melt some of it later. This was then bonded on top of my fabric snippets.
I made a template of a leaf and pinned it to my fabric sandwich and using free machine stitching outlined the shape of the leaf on to my fabric. Discard the paper template and first cut around the outside of your stitching and then add more stitching for veins. I then took some wrapped cord and couched it down the middle for the central vein and stem.
Now the fun bit! Take a heat tool, you can use a soldering iron, a heat tool that looks a bit like a hairdryer or as a last resort a lighter will do. Make sure you are standing near the sink in case of fire. Now apply heat to parts of the leaf to expose your fabric snippets in some places and the felt base in others.More stitching can be added if you wish. I added a few french knots by hand.
Now back to the paper.
So all of the elements would blend together more easily I decided to tear the paper rather than cutting it. I played around with the papers and carrier rods until I was satisfied  and then bonded then all together along with some tea bag papers and the hessian snippets. 
All that was left was to stitch the leaf to the backing which I did by hand down the central vein only so the leaf stands proud. I mounted it on a piece of mount board and trimmed the edges.
I am going to put it in a box frame to display. Here is a close up picture so you can see the textures more clearly.